In the era of Generative AI, even the humble QR code is getting a creative makeover. Its simplicity opens up a world of possibilities. Approach your branding in a way that’s never been done before, full of unique experiences that captivate your audience. QR codes are just the tip of the iceberg – generated captchas and dynamic email signatures are some other applications.
The Blazing Potential of Custom QR Codes
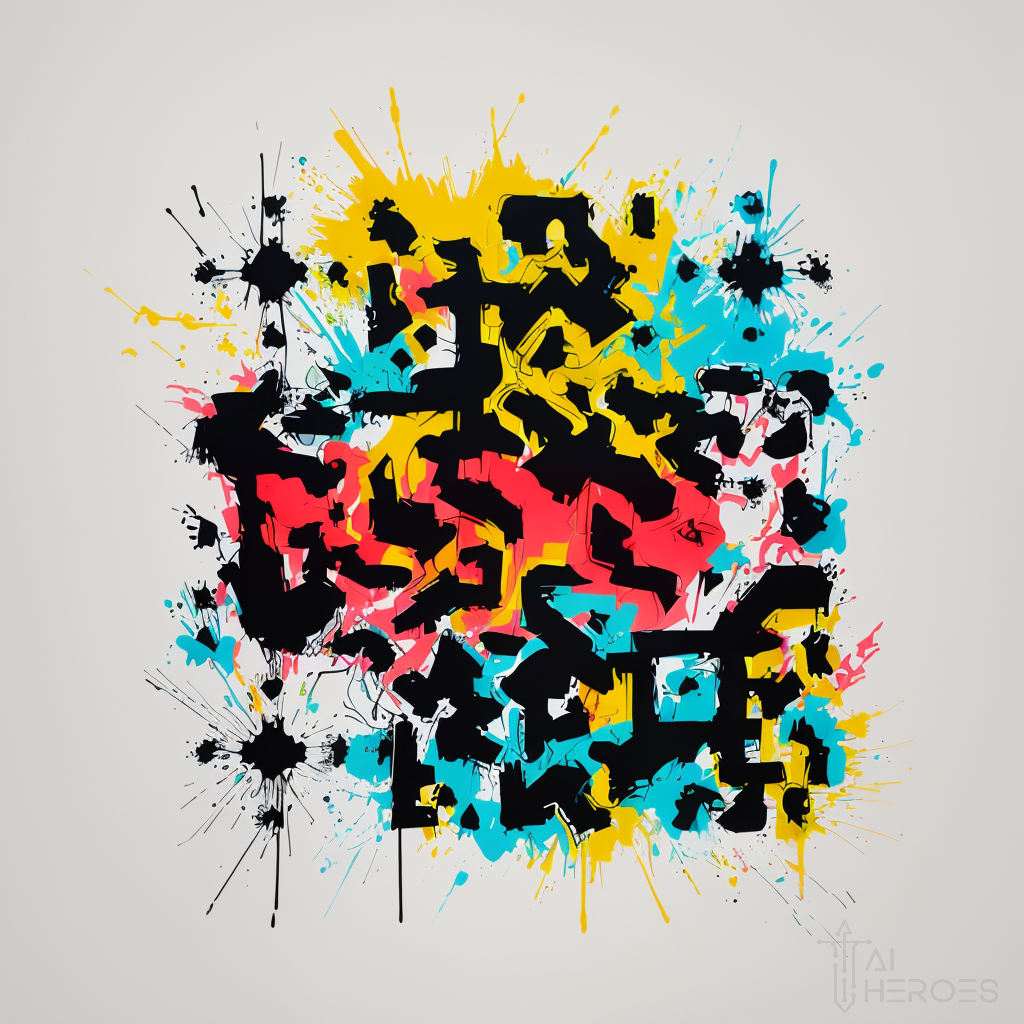
Custom designed QR codes have always been a thing but more as a novelty rather than an actual branding instrument. Manually designing a visually stunning QR code from scratch is a lengthy, and costly endeavour – but its value is real. Now you can do it for free with a few minutes of preparation time. QR codes are everywhere, stickers, websites, products. These hidden computer codes are the perfect marketing opportunity for you. Brand them, put them everywhere, they can be your next upscale boost!
Try it out for yourself:
How to Craft Your Own AI-Generated QR Masterpieces
We’re giving you a glimpse into how Generative AI works without the flashy proprietary bits. This is a perfect opportunity to not only experiment but break the boundary into the world of image generation.
For this tutorial we’ll be using the baseline technology without any proprietary skins. The process isn’t plug and play, but it’s not hard either. Think of it similar to the first time you learnt how to use spreadsheets on a computer. Break the mystery behind the process and then it’s easy.
The setup
Step 1: Download the Necessary Models
To get started, you’ll need to download specific models from Hugging Face, a collaborative platform widely used in the AI community by both businesses and academic institutions. These models are essential for the functionalities we’ll be exploring.
- For Image Generation
- We’re using the
AbsoluteRealitymodel. Click here to download theabsolutereality_v181.safetensorsfile. This model is designed to assist with advanced image generation tasks.
- We’re using the
- For the QR Code Feature
- The ControlNet QR Pattern model is what you need. Click here to download the
QRPattern_v2_9500.safetensorsfile. This model enables the application to recognize and interact with QR codes effectively.
- The ControlNet QR Pattern model is what you need. Click here to download the
Ensure you download these files to an accessible location on your device, as you’ll need them in the upcoming steps.
Step 2: Install the Necessary Client
To use the models you’ve just downloaded, you’ll need to install a specific client. If you’re new to using Stable Diffusion on your device, we recommend the automatic1111 client, known for its straightforward, one-click installation process.
For Windows Users:
- Download the Client: Click here to download the
sd.webui.zipfile for Windows. - Installation: Once downloaded, extract the ZIP file to your preferred location. Remember this location, as you’ll need to access this folder for future steps.
- Running the Client: To start the client, navigate to the extracted folder and double-click on
webui-user.bat. This action will launch the client interface.
For macOS and Linux Users:
- Access the Client: The automatic1111 client is also available for macOS and Linux. Visit the automatic1111 GitHub page for detailed instructions on downloading and setting up the client on your operating system.
Ensure you follow the installation steps appropriate for your operating system to set up the client correctly for using Stable Diffusion.
Step 3: Configure the Client for Image Generation
Once the automatic1111 client is installed, it’s time to set it up for generating images with the models you’ve downloaded.
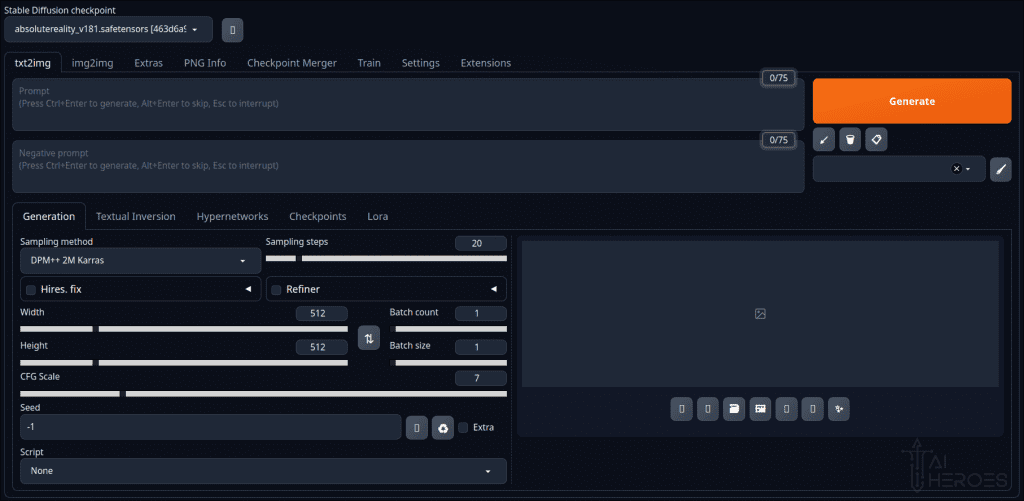
3.1 Load the Model:
- Launch the automatic1111 client by running the
webui-user.batfile for Windows, or follow the equivalent steps for macOS/Linux. - In the Stable Diffusion interface, click on the dropdown menu and select
absolutereality_v181.safetensorsto load the model for image generation.

3.2 Set up extensions
- Navigate to the
Extensionstab in the client. - Here, you can manage additional features to enhance the model’s capabilities.
- To add the QR code feature, click on
Install from URL, paste the URLhttps://github.com/Mikubill/sd-webui-controlnet.gitinto the field, and pressInstall.


Install from URL, paste the URL https://github.com/Mikubill/sd-webui-controlnet.git into the field, and press Install.” - Once installed, you should see the extension in the
Installedlist. Press ‘Apply and restart UI’ to enable it.
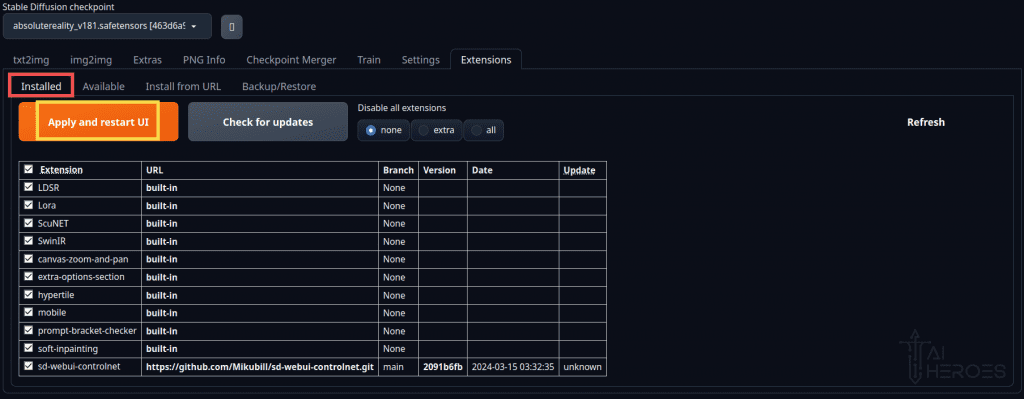

Installed list. Press ‘Apply and restart UI’ to enable it.“3.3 Set up the models
Now it’s time to move and load the models you downloaded into the program:
- Locate Installation Directory: The installation directory is where the
stable-diffusion-webuifolder is located. This is the folder created when you installed theautomatic1111version of Stable Diffusion. Its location depends on where you chose to install or extract it.
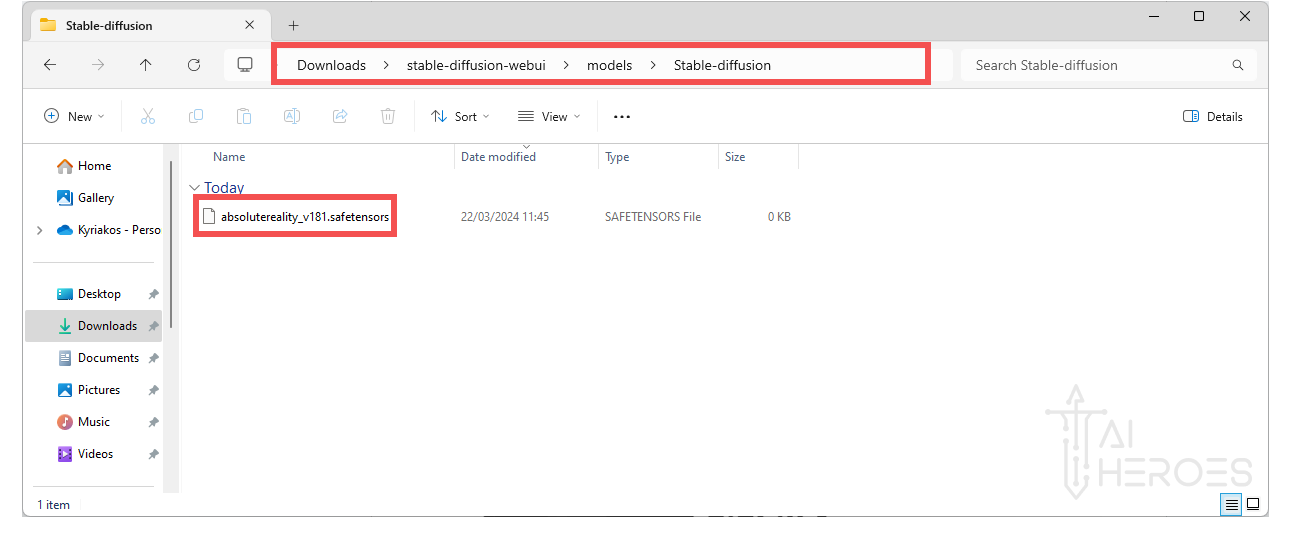
- Access Main Model Directory: To place the
absolutereality_v181.safetensorsfile, you should move it to thestable-diffusion-webui/models/Stable-diffusion/directory within the installation folder. This is where the main model files are stored.
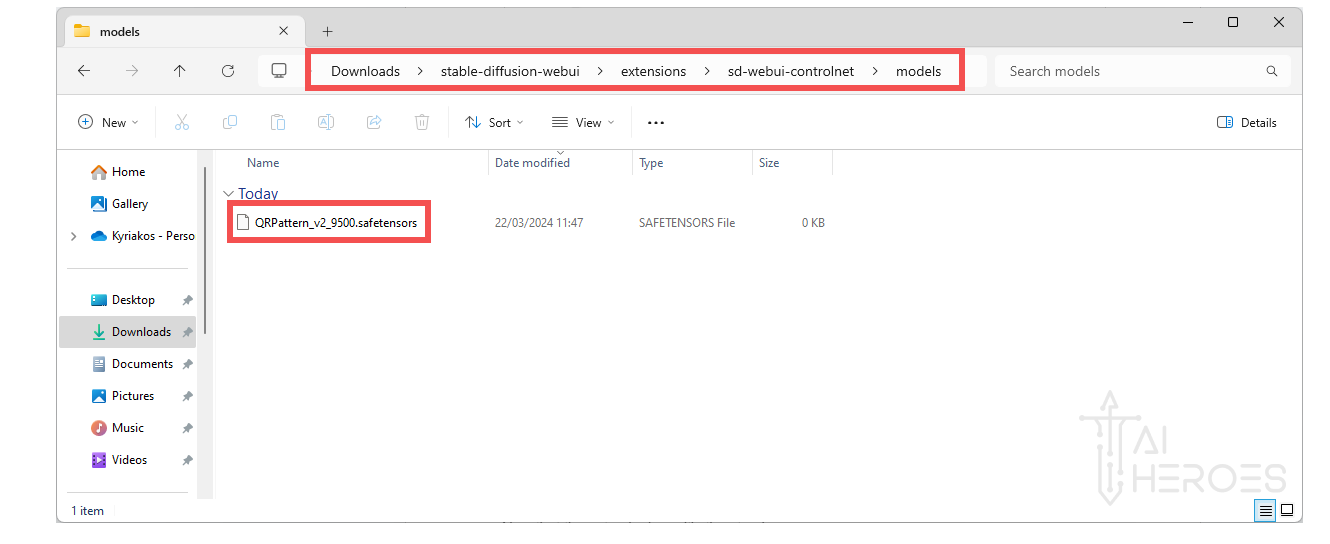

- Find Extension Model Directory: For the
QRPattern_v2_9500.safetensorsfile, they you to move it to thestable-diffusion-webui/extensions/sd-webui-controlnet/models/directory. This path is for additional models or extensions that enhance the functionality of the system (like this QR-model).

Step 4: Let the Fun Begin: Generating Your First QR Code
Congratulations on completing the setup! Now, we dive into the exciting part of our journey – creating and experimenting with QR codes.
4.1 Generate Your QR Code
- First, generate a QR code using
https://qrcode.antfu.me - Feel free to experiment with the settings, but just the link and file would be enough:
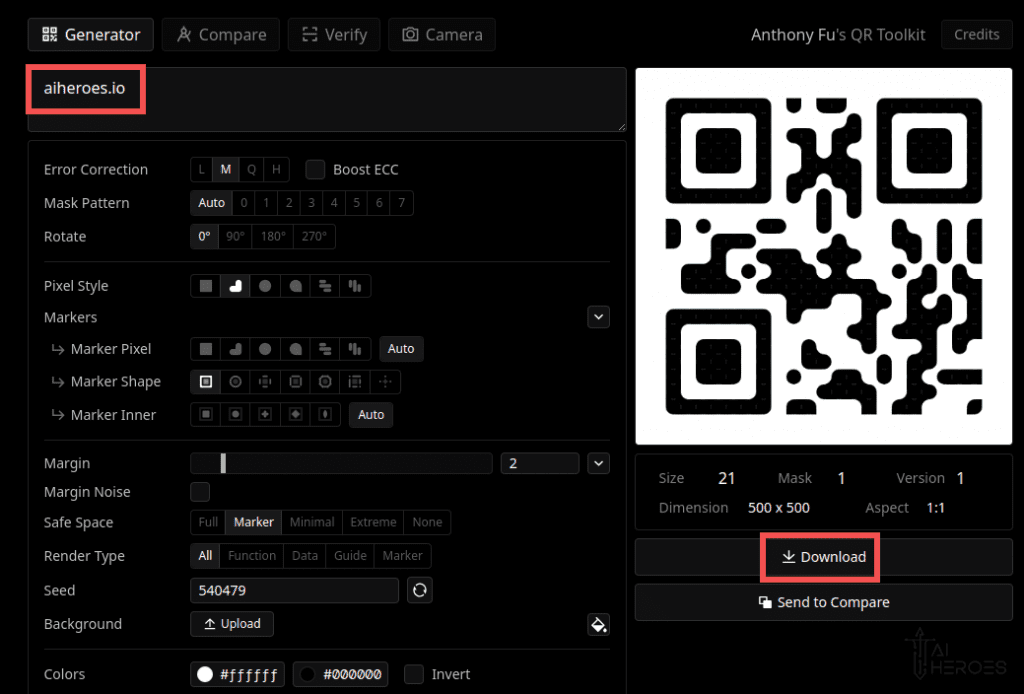

https://qrcode.antfu.me“4.2 Generating images
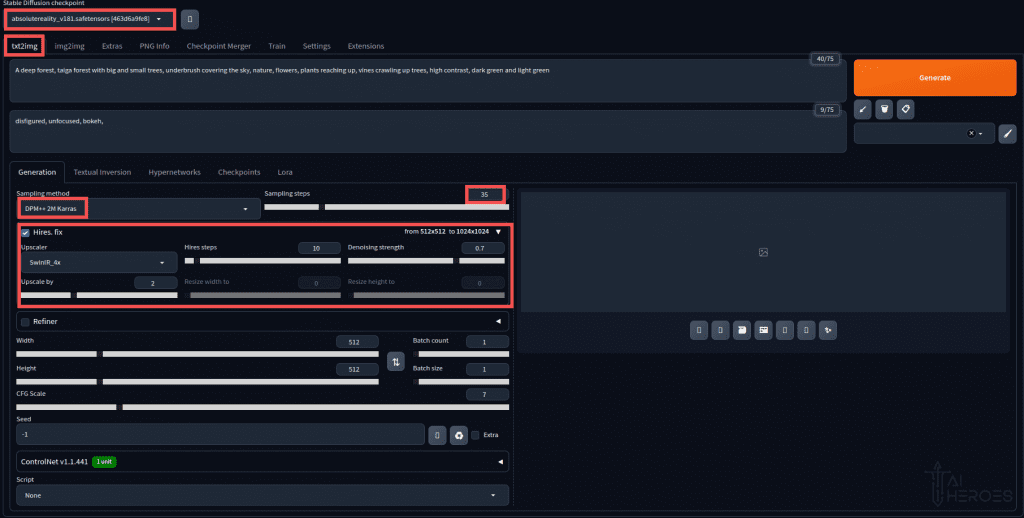
Go back to the “txt2img” tab in your Stable Diffusion interface and fill in the following:
- Model Selection: Set the model to
absoluterealityfor an optimal experience. - Sampling Method: You have the freedom to adjust this. A good starting point is trying out
DPM++ 2M Karras. It’s a balance between quality and efficiency. - Sampling Steps: Set this between 20 to 35 steps. Feel free to experiment within this range to see what works best for your needs.
- Troubleshooting: If you encounter any issues, consider disabling the “hires fix.” Be mindful that this might compromise the final image quality, but it can be a useful troubleshooting step.

4.3 Crafting Your Image with Precision: Using Prompts
At this stage, creativity becomes your best tool. The power of prompts allows you to shape the outcome to your liking.
- Positive Prompts: Think of these as your creative wishlist. They define what elements you desire in your image. Be as detailed or as broad as you like.
- Negative Prompts: These are equally important and act as your image’s guardrails. They help you exclude elements or themes you don’t want in your final piece. If you’re creating that serene landscape, you might include negative prompts like “no buildings,” “no people,” or “no technology” to maintain the natural elements.
Some QR-code prompt inspiration
Mountain Landscape theme, featuring elements like towering peaks, a serene lake, and a forest in the foreground. Utilize a color palette of crisp blues, snowy whites, and earthy greens to reflect the majestic allure of mountain landscapes.
Graffiti theme, incorporating elements like spray-painted designs, stylized lettering, and urban patterns. Use a color palette of vivid and diverse colors to reflect the bold and rebellious nature of graffiti
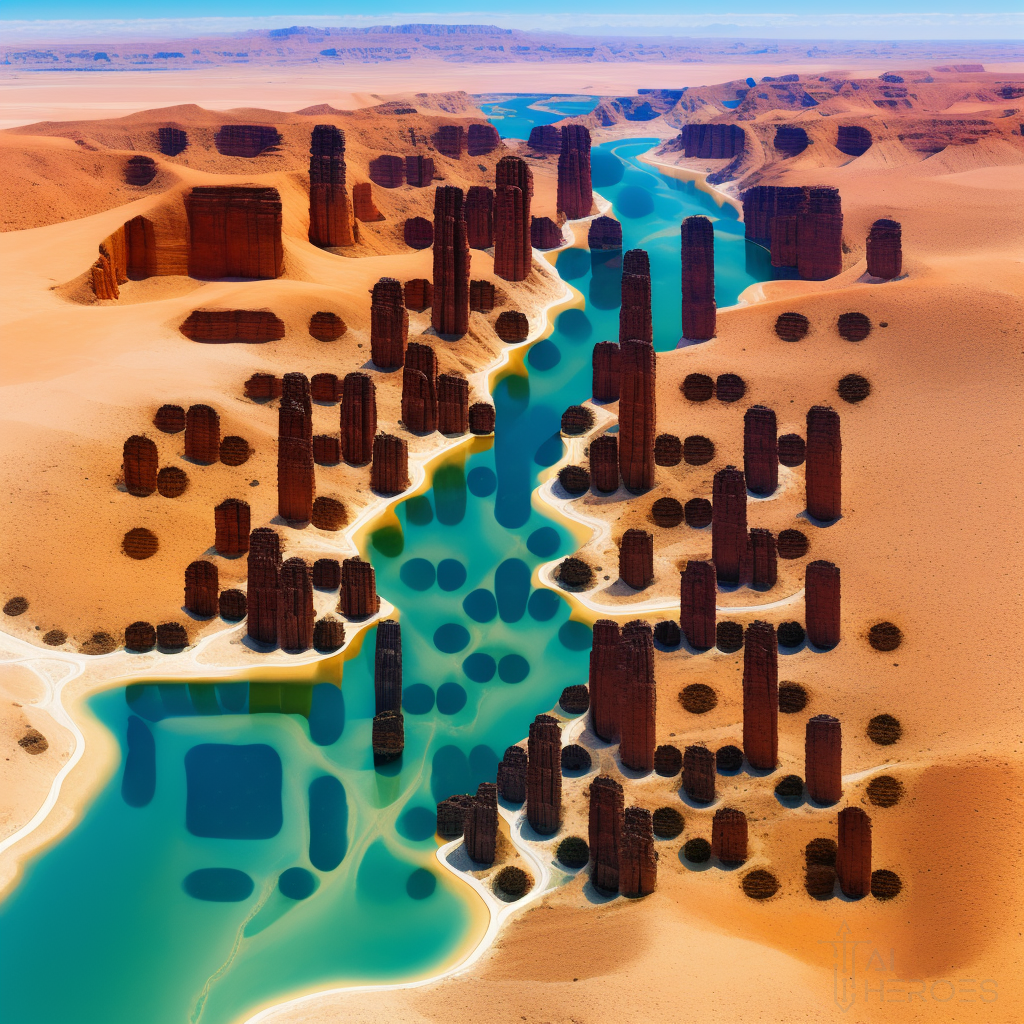
A sky view of a colorful lakes and rivers flowing through the desert, hard shadows from direct sunlight
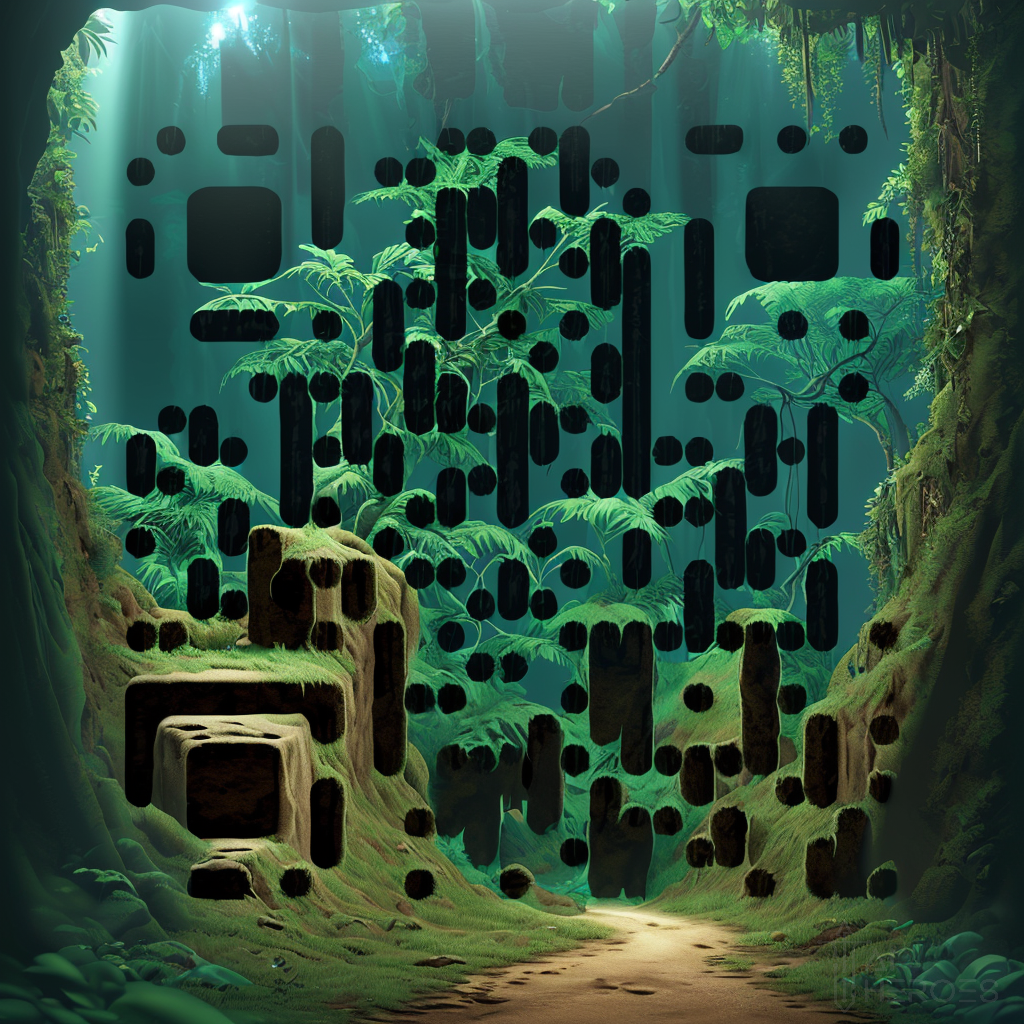
A deep forest, taiga forest with big and small trees, light shining through the underbrush covering the sky, nature, flowers, plants reaching up, vines crawling up trees, high contrast, dark green and light green
Sunset theme, featuring elements such as descending sun, blending colors of twilight, and silhouettes. Utilize a color palette of radiant oranges, deep purples, and soft pinks to capture the serene beauty of a sunset.
Do you enjoy having a front-view seat into the world of AI? Subscribe to our bi-weekly newsletter today and stay up-to-date in this fast changing world.
Future Minds Newsletter BY AI Heroes
4.3 Implementing Your Prompts in Stable Diffusion
- Scroll to the “ControlNet” Tab: This is where you’ll input your prompts.
- Expand the Tab: Here, you’ll find options to enter both your positive and negative prompts. Take your time to input these carefully, as they significantly influence your image’s outcome.
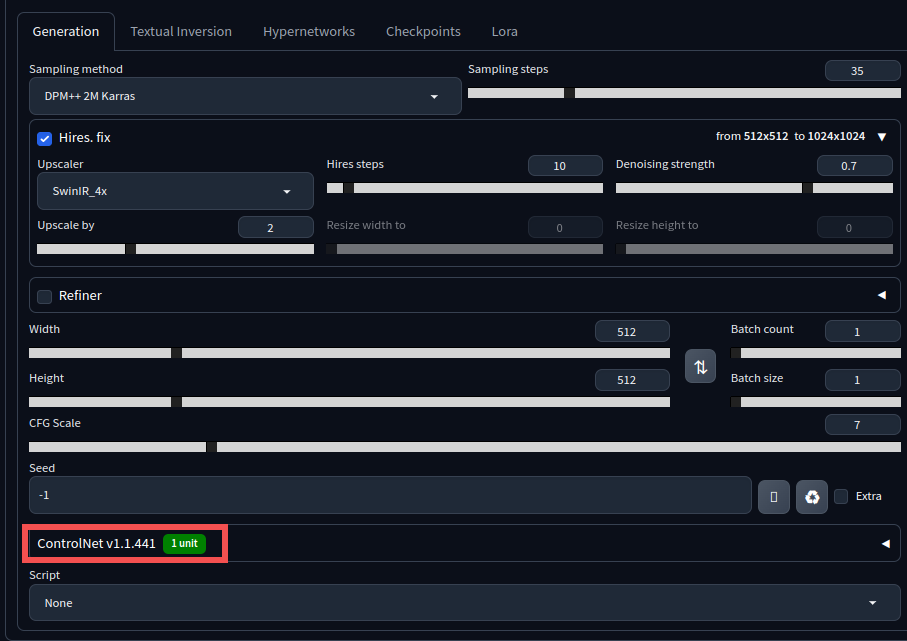

4.4 Setting Up QR Code Generation
- Input Your Desired Settings: Based on what you’ve learned so far, adjust the settings to match the type of image you’re aiming to create with the QR code.
- Make sure to check
EnableandPixel Perfect. - Set the model to
QRPattern_v2_9500. - It’s very important to set the control weight somewhere within the range of
1.1 - 1.3to get a working QR code.
- Make sure to check
- Hit ‘Generate’: With everything set, it’s time to bring your vision to life. Click on Generate and wait for the magic to happen.


4.5 Seeing Your Results
The anticipation is part of the fun! Once the generation process is complete, you’ll see the result of your creativity combined with powerful AI. Remember, each attempt is a learning opportunity, so feel free to refine your prompts and settings as you go.
This is what we got:


5. Ensuring Your QR Code is Easily Scannable
Having trouble with QR code scan-ability? Here are some tips to improve contrast and readability, making your QR codes work flawlessly every time.
- Boosting Contrast with Creative Prompts
- The key to a scannable QR code often lies in its contrast. Use your prompts to create images that allow for sharp, high-contrast transitions.
- Example: Instead of just
A sprawling skyline, tryA sprawling skyline, with light shining past the contours of the skyscrapers. This small adjustment can significantly enhance contrast.
- Optimal Scanning Distance
- If your QR code isn’t scanning easily, try these steps:
- Increase Distance: Move 1-2 meters back. Scanning from a bit farther away can sometimes help.
- Size Matters: Keeping the QR code small can improve its contrast and make it easier for some phones to scan.
5.1 Utilizing Tools for Perfection
Anthony Fu’s QR Code Generator is more than just a creation tool; it’s your companion in refining QR codes:
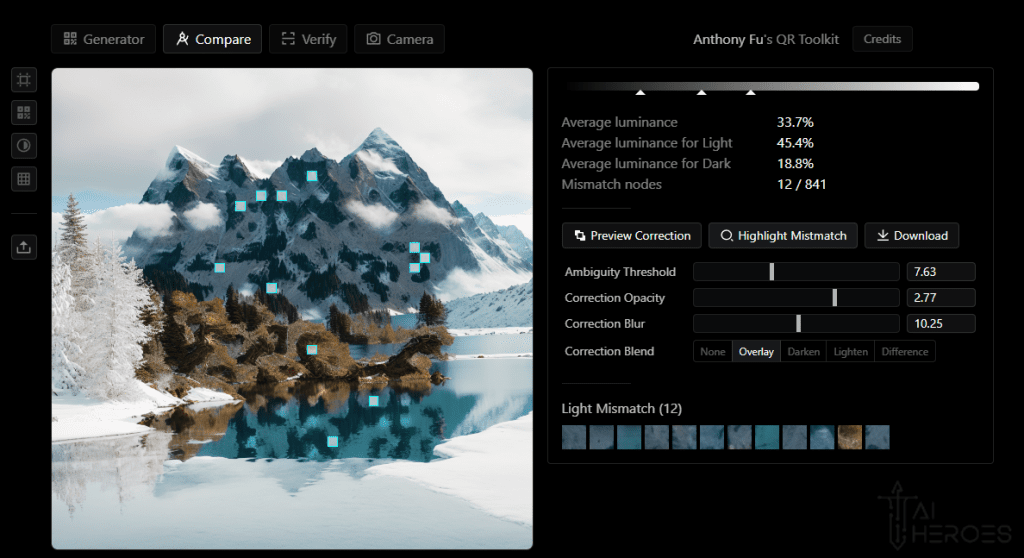
Compare Tab: This feature lets you diagnose issues with your QR code. By comparing your image and QR code, you can identify mismatched squares that might be causing scanning problems. After inputting your image and QR code, go to highlight mismatch to see what squares are problematic:

Fine-Tuning Your QR Code
After identifying problematic areas:
- Adjust Settings: Play with the Correction Opacity, Blur, and blend settings to enhance the mismatched areas. This can make your QR code much easier to scan.
- Look for Brighter Spots: Successful adjustments will result in brighter white spots in previously mismatched areas, significantly improving QR readability.


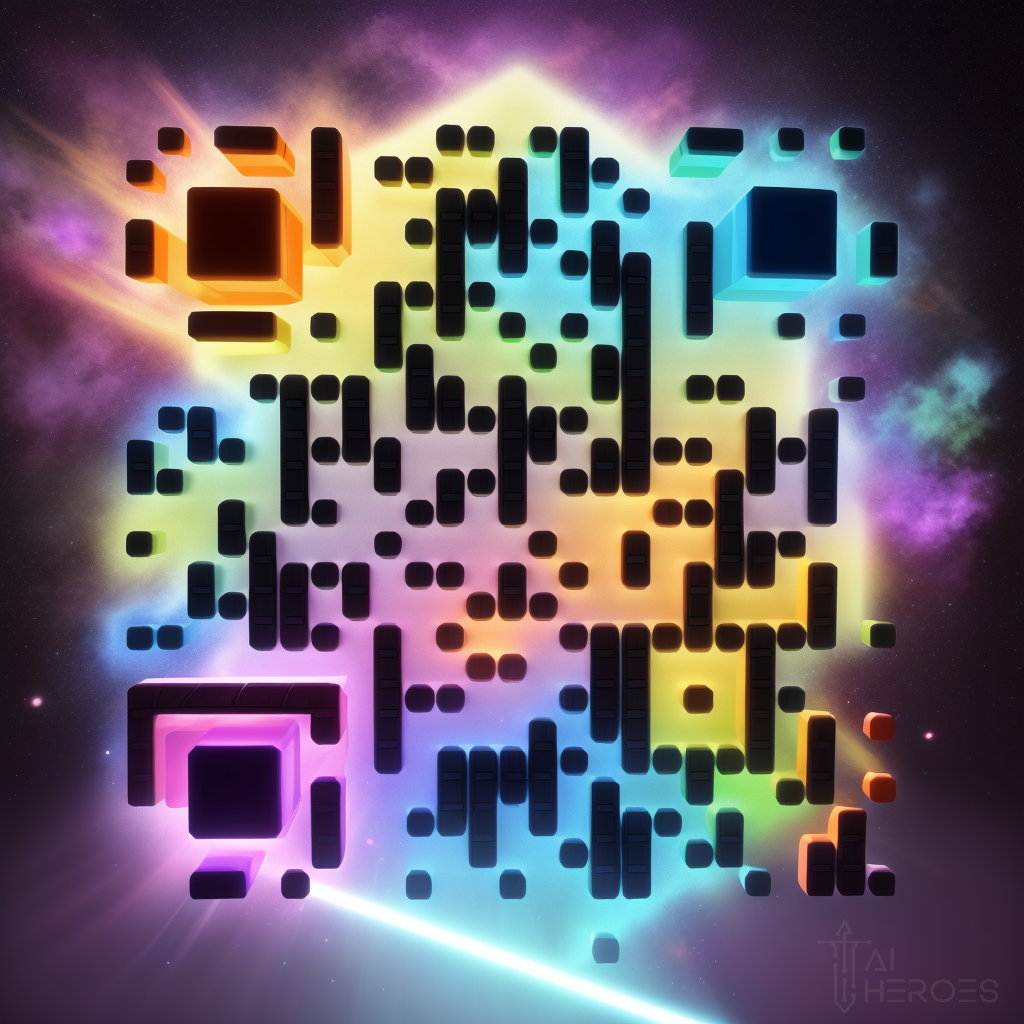
More QR Eye Candy:



Seize AI Opportunities – Be an AI Hero:
A true AI Hero unleashes the full potential of Generative AI. Harnessing the power of AI customization opens up a world of possibilities, not just with QR codes but all aspects of your business.
Embrace the future of AI and unlock its full potential of artistic QR codes. Whether you’re a small or large business looking to elevate their marketing game, AI Heroes is here to guide you every step of the way.
Ready? Click the button below to schedule your one-on-one meeting.
